这篇文章主要介绍了VS2022+libtorch+Cuda11.3安装测试(调用cuda),本文通过图文并茂的形式给大家介绍的非常详细,对大家的学习或工作具有一定的参考借鉴价值,需要的朋友可以参考下
以下内容默认cuda已经安装完成并添加至系统环境变量
1.下载libtorch
PyTorch
在官网下载压缩包, 可以选择Release版或者Debug版(根据自己需要):
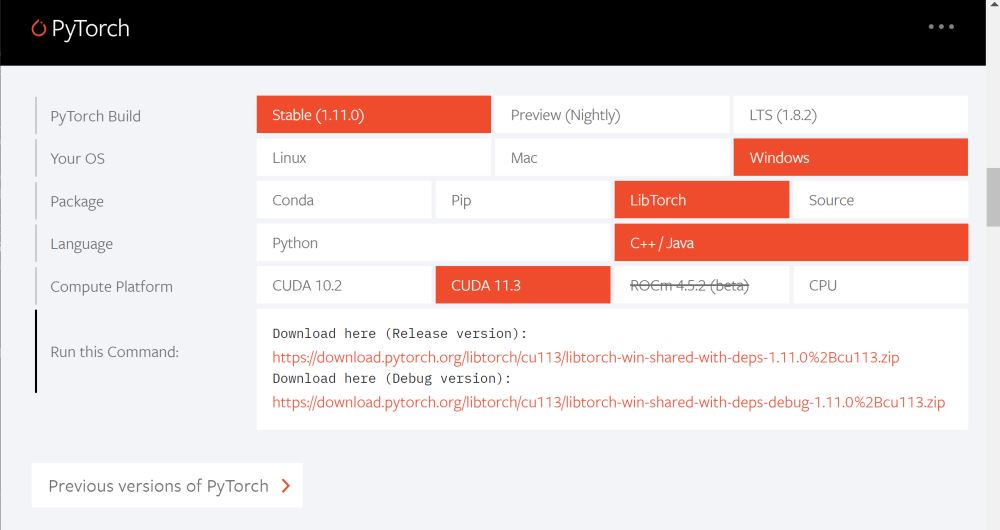
下载完成之后选择安装软件的位置进行解压
2.配置VC++目录:
VS新建空项目
2.1添加包含目录:
D:\soft\libtorch\libtorch\include
D:\soft\libtorch\libtorch\include\torch\csrc\api\include
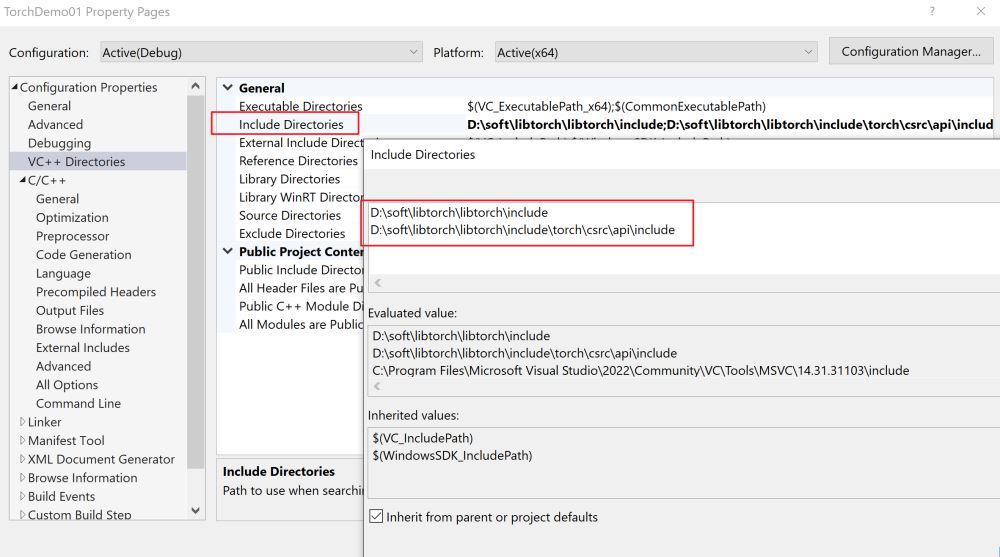
2.2添加库目录:
D:\soft\libtorch\libtorch\lib
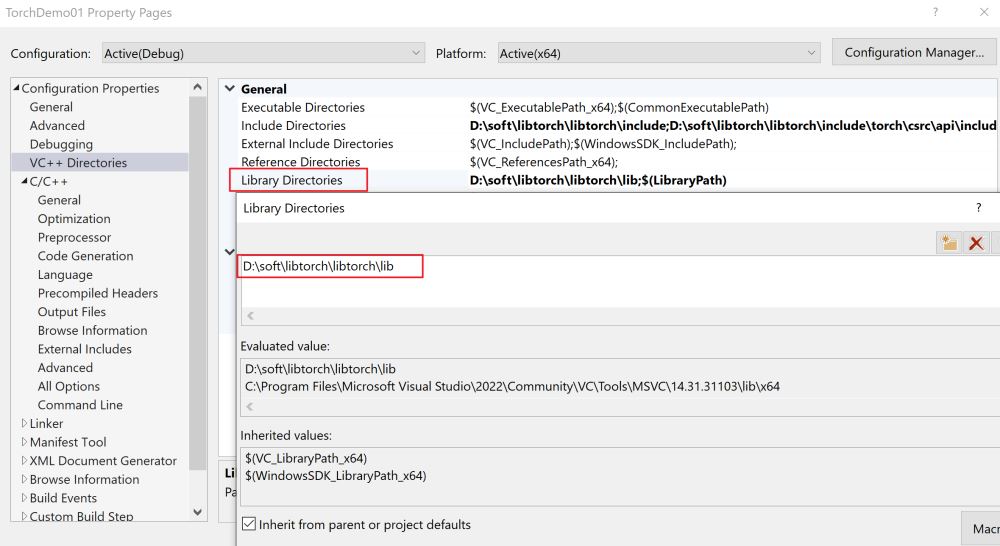
3.配置环境变量:
PATH=D:\soft\libtorch\libtorch\lib;%PATH%
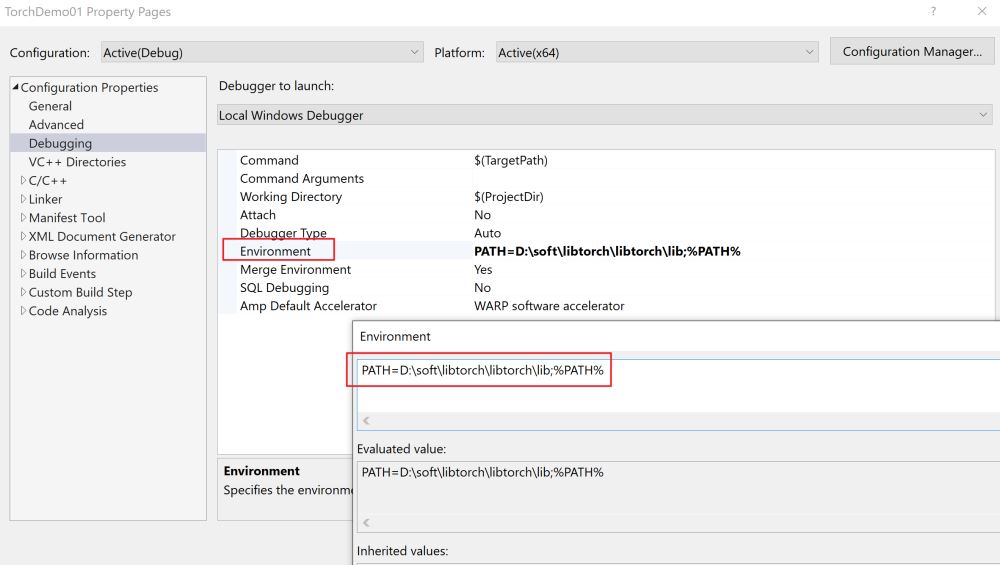
4.配置链接器: 4.1链接器--input
D:\soft\libtorch\libtorch\lib\*.lib
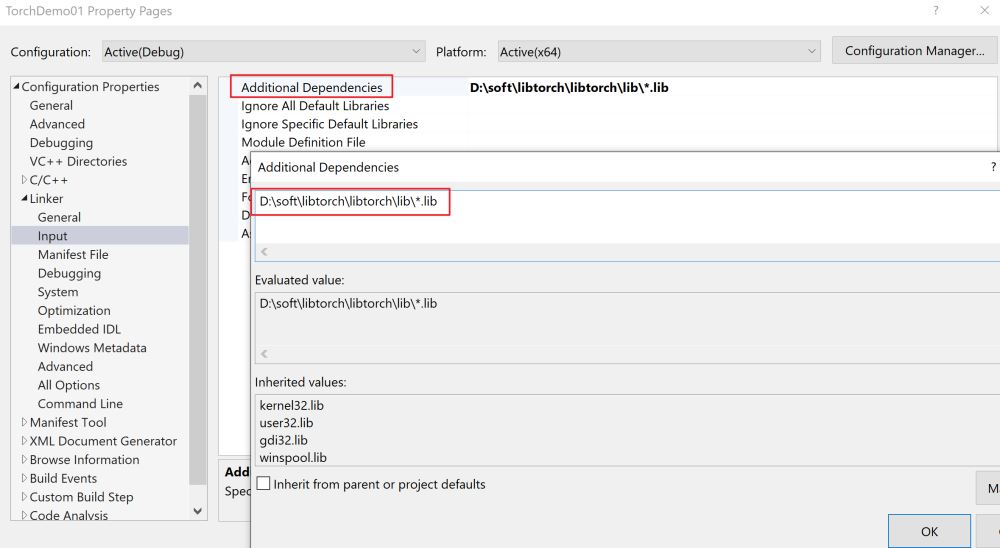
4.2链接器--Command Line
/INCLUDE:?warp_sizeat@@YAHXZ /INCLUDE:?_torch_cuda_cu_linker_symbol_op_cudaat@@YA?AVTensorAEBV32@@Z

5.测试配置结果:
#include<torch/torch.h>
#include<torch/script.h>
#include<iostream>

int main() {
	std::cout << "cuda::is_available():" << torch::cuda::is_available() << std::endl;
	std::cout << "torch::cuda::cudnn_is_available():" << torch::cuda::cudnn_is_available() << std::endl;
	std::cout << "torch::cuda::device_count():" << torch::cuda::device_count() << std::endl;
	torch::Device device(torch::kCUDA);
	torch::Tensor tensor1 = torch::eye(3); // (A) tensor-cpu
	torch::Tensor tensor2 = torch::eye(3, device); // (B) tensor-cuda
	std::cout << tensor1 << std::endl;
	std::cout << tensor2 << std::endl;
}
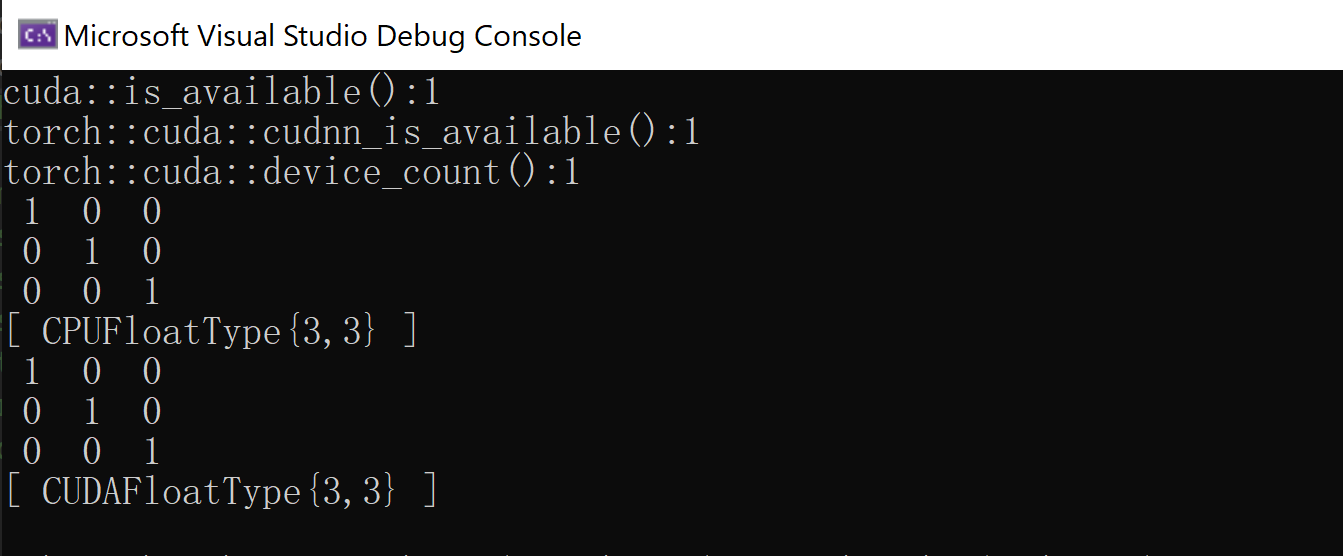
正常结果输出如下:
参考:
Libtorch + vs 2019安装及配置_开拓者5号的博客-CSDN博客_vs2019配置libtorch
Win10+libtorch+CUDA+vs2017_大智若鱼.AI的博客-CSDN博客
win10系统上LibTorch的安装和使用(cuda10.1版本)_*匿名*的博客-CSDN博客_cuda libtorch
libtorch with Cuda 11.3 not linked properly on Windows using Visual Studio 2022 · Issue #72396 · pytorch/pytorch · GitHub
c10::NotImplementedError with minimal example - C++ - PyTorch Forums
到此这篇关于VS2022+libtorch+Cuda11.3安装测试(调用cuda)的文章就介绍到这了,更多相关VS2022 libtorch Cuda11.3安装内容请搜索编程学习网以前的文章希望大家以后多多支持编程学习网!
本文标题为:VS2022+libtorch+Cuda11.3安装测试教程详解(调用cuda)


基础教程推荐
- 纯C++代码详解二叉树相关操作 2023-05-15
- 利用QT设计秒表功能 2023-05-30
- C语言数组长度的计算方法实例总结(sizeof与strlen) 2023-04-26
- 05-C语言进阶——动态内存管理 2023-11-20
- g++: const 丢弃限定符 2022-10-07
- C语言的三种条件判断语句你都了解吗 2023-03-05
- C语言植物大战数据结构二叉树递归 2023-04-09
- Qt数据库应用之实现通用数据库请求 2023-03-18
- character-encoding – Linux中最常见的C语言编码(和Unix?) 2023-11-21
- VisualStudio2010安装教程 2023-01-05


