Web Components入门教程示例详解 目录 Web Components不兼容IE 困境 Web Components核心技术 自定义元素 HTML模板(template.slot) shadow root(影子Dom) Web Components不兼容IE 2011年提出Web Components,为了解决代码复用问题,早于React.Vue: 相对于React.Vue组件,Web Components是原生组
目录
- Web Components不兼容IE
- 困境
- Web Components核心技术
- 自定义元素
- HTML模板(template、slot)
- shadow root(影子Dom)
Web Components不兼容IE
2011年提出Web Components,为了解决代码复用问题,早于React、Vue;
相对于React、Vue组件,Web Components是原生组件,不限制接入方的技术,可以接入到React、Vue等技术框架中
困境
- 兼容性不足,需要主流浏览器的支持,需要平缓的过渡
- 没有标准的数据绑定机制、在处理自定义元素内部数据、UI更新、组件间参数传递时不够便捷和友好,目前来看大多还依赖于操控dom去实现UI更新
Web Components核心技术
- 自定义元素
- HTML模板
- 影子Dom
自定义元素

使用 window.customElements.define 自定义html标签元素,自定义元素需要我们用JS封装一个,我们在html内使用的自定义元素custom-button就是该类的实例;
自定义标签的生命周期 constructor -> attributeChangedCallback -> connectedCallback
 <!DOCTYPE html>
<html lang="en">
  <head>
    <meta charset="UTF-8" />
    <meta http-equiv="X-UA-Compatible" content="IE=edge" />
    <meta name="viewport" content="width=device-width, initial-scale=1.0" />
    <title>Document</title>
  </head>
  <body>
    <custom-button></custom-button>
    <script>
      class CustomButton extends HTMLElement {
        constructor() {
          super();
          console.log("this", this);
          const info = document.createElement("span");
          info.setAttribute("class", "test_custom");
          info.textContent = "自测自定义标签";
          var container = document.createElement("div");
          container.classList.add("container");
          this.append(info, container);
        }
      }
      customElements.define("custom-button", CustomButton);
    </script>
  </body>
</html>
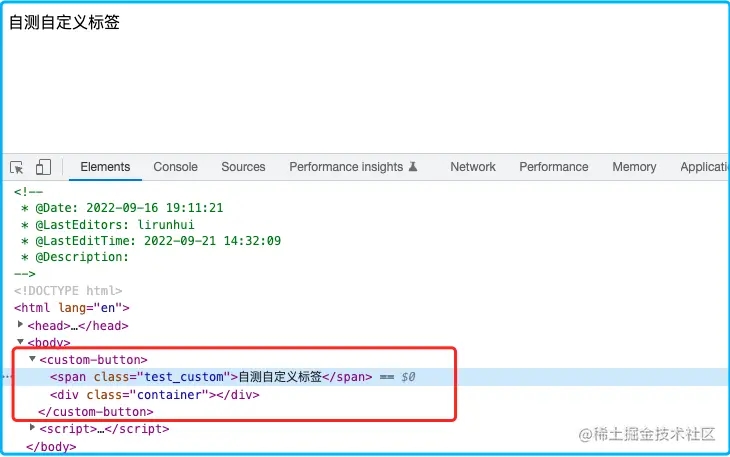
我们可以看到CustomButton继承了HTMLElement,也就是继承了HTML元素的特性,最后我们执行了this.append(DOM),也就是将元素内容添加到当前自定义标签内,this表示自定义元素实例
HTML模板(template、slot)

<template>:包含一个html片段,不会在html初始化时渲染。主要作用是:通过JavaScript获取该代码片段将其放入自定义标签内显示,主要作用于自定义标签
<!DOCTYPE html>
<html lang="en">
  <head>
    <meta charset="UTF-8" />
    <meta http-equiv="X-UA-Compatible" content="IE=edge" />
    <meta name="viewport" content="width=device-width, initial-scale=1.0" />
    <title>Document</title>
  </head>
  <body>
    <template id="test_template">
      <div class="container">
        <span class="test_custom">自测自定义标签</span>
      </div>
    </template>
    <custom-button></custom-button>
    <script>
      class CustomButton extends HTMLElement {
        constructor() {
          super();
          const dom = document.querySelector("#test_template").content;
          this.append(dom);
        }
      }
      customElements.define("custom-button", CustomButton);
    </script>
  </body>
</html>
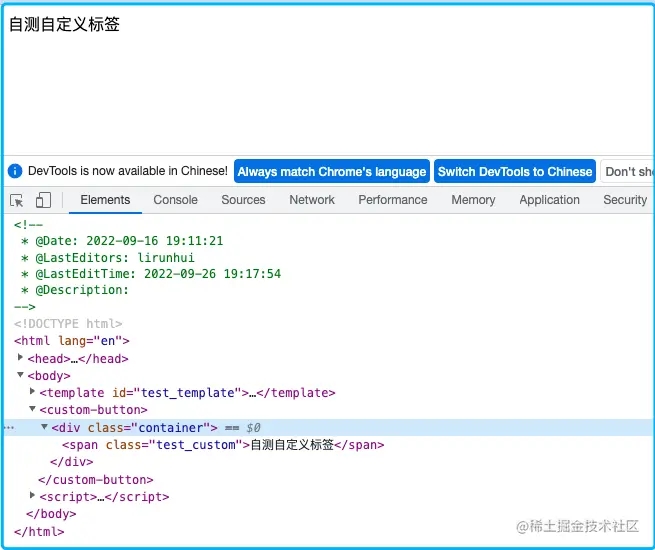
我们可以发现这种写法相对于前一种方式,更加易读以及便捷
<slot>插槽:给模板元素传值,增强模板元素的灵活性和通用性。 slot在使用过程中具备以下特性
- 必须在影子Dom种使用,否则不具备插槽的效果
- 给 Slots 传值的元素必须是自定义元素的直接子元素,否则传值失效
<!DOCTYPE html>
<html lang="en">
  <head>
    <meta charset="UTF-8" />
    <meta http-equiv="X-UA-Compatible" content="IE=edge" />
    <meta name="viewport" content="width=device-width, initial-scale=1.0" />
    <title>Document</title>
  </head>
  <body>
    <template id="test_template">
      <div class="container">
        <span class="test_custom">自测自定义标签</span>
        <slot name="userName" slot="userName"></slot>
      </div>
    </template>
    <custom-button>
      <div class="name_cls" slot="userName">张三</div>
    </custom-button>
    <script>
      class CustomButton extends HTMLElement {
        constructor() {
          super();
          const dom = document.querySelector("#test_template").content;
          this.append(dom);
        }
      }
      customElements.define("custom-button", CustomButton);
    </script>
  </body>
</html>
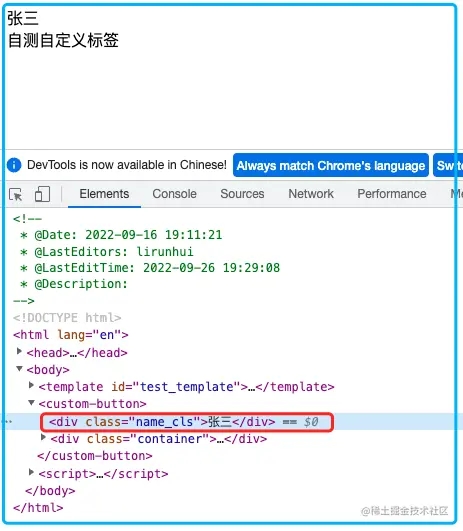
通过上图发现我们插入的<div class="name_cls">张三</div>并没有插入到container节点内,主要是因为我们的slot没有用在影子dom种,所以浏览器将<div class="name_cls">张三</div>当成其正常的元素进行渲染了;
 <script>
      class CustomButton extends HTMLElement {
        constructor() {
          super();
          const shadow = this.attachShadow({ mode: "closed" });
          const dom = document.querySelector("#test_template").content;
          shadow.append(dom);
        }
      }
      customElements.define("custom-button", CustomButton);
</script>

当我们将slot插入在影子dom,可以发现slot生效了;
另外需要注意的一个点,当使用slot的时候下边这个用法是错误的
// 错误示范
 <custom-button>
     <div> //不能有这一层级
       <div class="name_cls" slot="userName">张三</div>
     </div>
</custom-button>
shadow root(影子Dom)
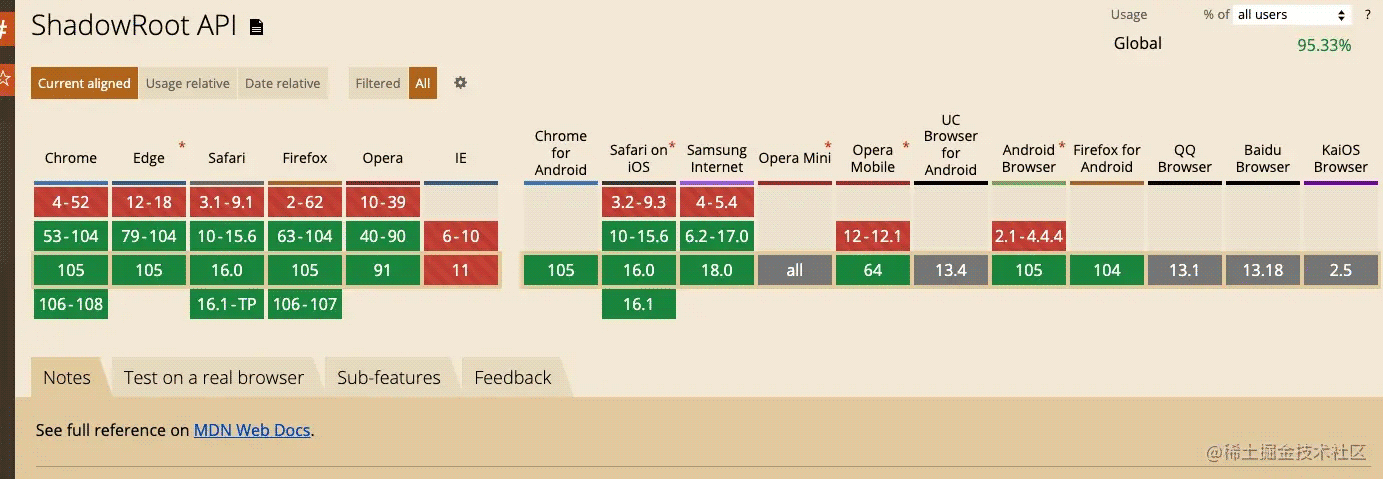
浏览器提供了一种机制用于隔离一段代码和另一段代码,说到这里你肯定想到iframe,但有时候iframe会显得非常的沉重以及隔离了太多,导致我们使用起来非常的麻烦; 我们可以利用shadow root将CSS和HTML绑定在一起封装成组件,并且其支持天然的样式隔离;
Element.attachShadow() 方法给指定的元素挂载一个 Shadow DOM,并且返回对 ShadowRoot 的引用。
 <script>
      class CustomButton extends HTMLElement {
        constructor() {
          super();
          const shadow = this.attachShadow({ mode: "closed" });
          const dom = document.querySelector("#test_template").content;
          shadow.append(dom);
        }
      }
      customElements.define("custom-button", CustomButton);
</script>
this.attachShadow({ mode: "closed" })的closed表示表示 Shadow DOM 是封闭的,不允许外部访问。如果mode的值是open,则表示内部的节点可以被外部访问;
添加样式
- 如果自定义元素需要样式,我们可以定义全局的样式,例如
custom-button{
  ...
}
- 正常情况我们应该将样式和自定义标签封装在一起
<!DOCTYPE html>
<html lang="en">
  <head>
    <meta charset="UTF-8" />
    <meta http-equiv="X-UA-Compatible" content="IE=edge" />
    <meta name="viewport" content="width=device-width, initial-scale=1.0" />
    <title>Document</title>
  </head>
  <body>
    <div>222</div>
    <template id="test_template">
      <div class="container">
        <span class="test_custom">自测自定义标签</span>
        <slot name="userName"></slot>
      </div>
      <style>
         :host {
          position: relative;
          top: 10px;
        }
        .test_custom {
          color: red;
        }
        div {
          border: 1px solid black;
        }
      </style>
    </template>
    <custom-button>
      <span slot="userName">张三</span>
    </custom-button>
    <script>
      class CustomButton extends HTMLElement {
        constructor() {
          super();
          const shadow = this.attachShadow({ mode: "closed" });
          const dom = document.querySelector("#test_template").content;
          shadow.append(dom);
        }
      }
      customElements.define("custom-button", CustomButton);
    </script>
  </body>
</html>

:host:表示当前的自定义元素节点;
另外可以发现我们定义的div样式只作用于了影子dom内部元素,对于外部的div没有任何影响,证明了影子Dom的样式隔离特性;
以上就是Web Components入门教程详解的详细内容,更多关于Web Components入门教程的资料请关注我们其它相关文章!
本文标题为:Web Components入门教程示例详解


基础教程推荐
- 浅析canvas元素的html尺寸和css尺寸对元素视觉的影响 2024-04-26
- JS前端广告拦截实现原理解析 2024-04-22
- vue离线环境如何安装脚手架vue-cli 2025-01-19
- 浅谈Vue2和Vue3的数据响应 2023-10-08
- js禁止页面刷新与后退的方法 2024-01-08
- Ajax实现动态加载数据 2023-02-01
- 基于Vue制作组织架构树组件 2024-04-08
- this[] 指的是什么内容 讨论 2023-11-30
- 关于文字内容过长,导致文本内容超出html 标签宽度的解决方法之自动换行 2023-10-28
- CSS3的几个标签速记(推荐) 2024-04-07
