在做全景拼接的时候,为了保持图片中的空间约束与视觉的一致性,需要进行柱面投影,否则离中心图像距离越远的图像拼接后变形越大。本文将具体介绍一下这如何实现,需要的可以参考一下
前言
在做全景拼接的时候,为了保持图片中的空间约束与视觉的一致性,需要进行柱面投影,否则离中心图像距离越远的图像拼接后变形越大。
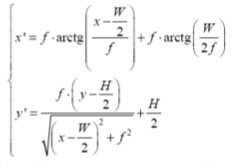
柱面投影公式为
实现代码
针对彩色图像
int main()
{
	cv::Mat image1 = cv::imread("images/1.jpg", 1);
	if (!image1.data)
		return 0;
	imshow("image1", image1);

	Mat imgOut = Mat(image1.rows, image1.cols, CV_8UC3);
	float w = image1.cols;
	float h = image1.rows;
	float f = (w / 2) / atan(PI / 8);

	for (int i = 0; i < image1.rows; i++)
	{
		for (int j = 0; j < image1.cols; j++)
		{
			float x = j;
			float y = i;
			float x1 = f * atan((x - w / 2) / f) + f * atan(w / (2.0f * f));
			float y1 = f * (y - h / 2.0f) / sqrt((x - w / 2.0f) * (x - w / 2.0f) + f * f) + h / 2.0f;

			int col = (int)(x1 + 0.5f);//加0.5是为了四舍五入
			int row = (int)(y1 + 0.5f);//加0.5是为了四舍五入

			if (col < image1.cols && row < image1.rows)
			{
				imgOut.at<Vec3b>(row, col)[0] = image1.at<Vec3b>(i, j)[0];
				imgOut.at<Vec3b>(row, col)[1] = image1.at<Vec3b>(i, j)[1];
				imgOut.at<Vec3b>(row, col)[2] = image1.at<Vec3b>(i, j)[2];
			}
		}
	}

	imshow("imgOut", imgOut);

	waitKey(0);
	return 0;
}
实现效果
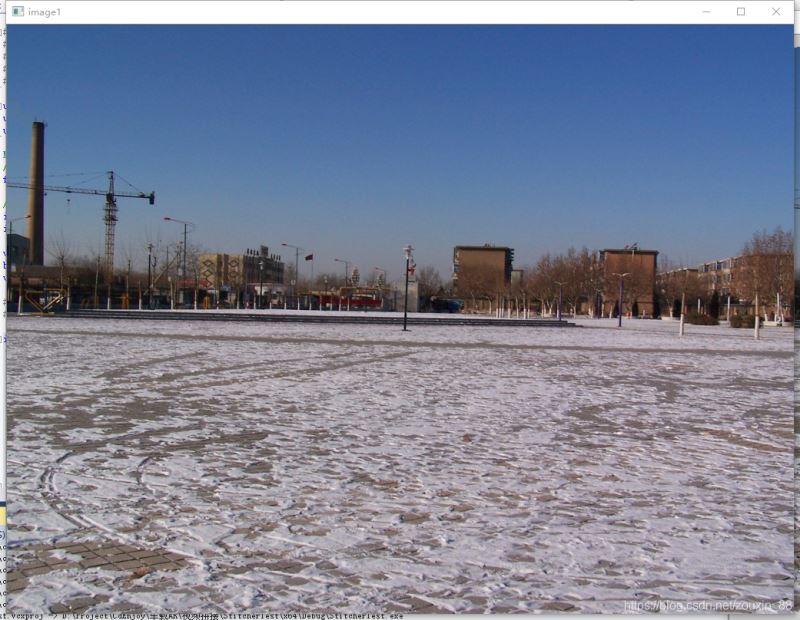
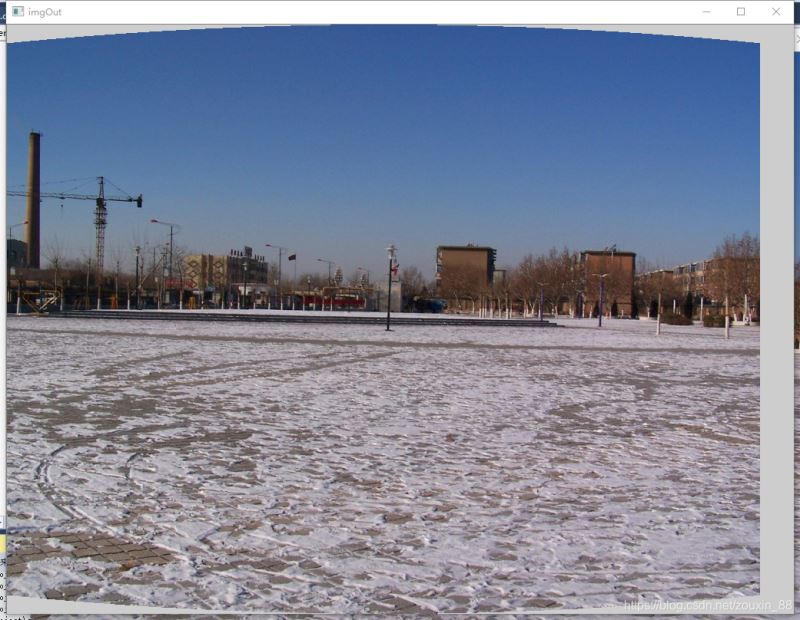
针对灰度图像
cv::Mat image1 = cv::imread("E:\\zcb_work\\2113\\pic2\\k.jpg", 0);
	if (!image1.data)
		return 0;
	imshow("image1", image1);

	cv::Mat image2 = cv::imread("E:\\zcb_work\\2113\\pic2\\j.jpg", 0);
	if (!image2.data)
		return 0;
	imshow("image2", image2);

 	Mat imgOut1 = Mat(image1.rows, image1.cols, CV_8UC1);
	imgOut1.setTo(0);
	Mat imgOut2 = Mat(image2.rows, image2.cols, CV_8UC1);
	imgOut2.setTo(0);

	float w = image1.cols;
	float h = image1.rows;
	float f = (w / 2) / atan(PI / 8);

	for (int i = 0; i < image1.rows; i++)
	{
		for (int j = 0; j < image1.cols; j++)
		{
			float x = j;
			float y = i;
			float x1 = f * atan((x - w / 2) / f) + f * atan(w / (2.0f * f));
			float y1 = f * (y - h / 2.0f) / sqrt((x - w / 2.0f) * (x - w / 2.0f) + f * f) + h / 2.0f;

			int col = (int)(x1 + 0.5f);//加0.5是为了四舍五入
			int row = (int)(y1 + 0.5f);//加0.5是为了四舍五入

			if (col < image1.cols && row < image1.rows)
			{
				imgOut1.at<uchar>(row, col) = image1.at<uchar>(i, j);
				imgOut2.at<uchar>(row, col) = image2.at<uchar>(i, j);
				//imgOut.at<Vec3b>(row, col)[1] = image1.at<Vec3b>(i, j)[1];
				//imgOut.at<Vec3b>(row, col)[2] = image1.at<Vec3b>(i, j)[2];
			}
		}
	}

	imshow("imgOut1", imgOut1);
	imshow("imgOut2", imgOut2);
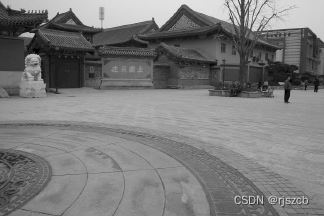
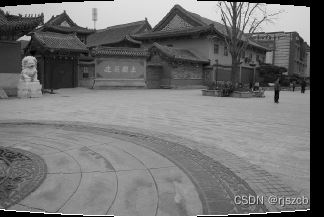
实现效果
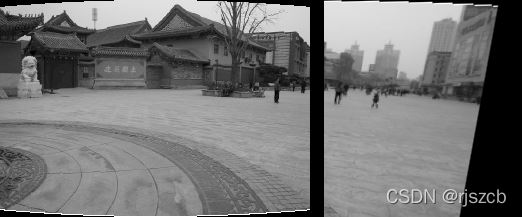
原图
柱面投影
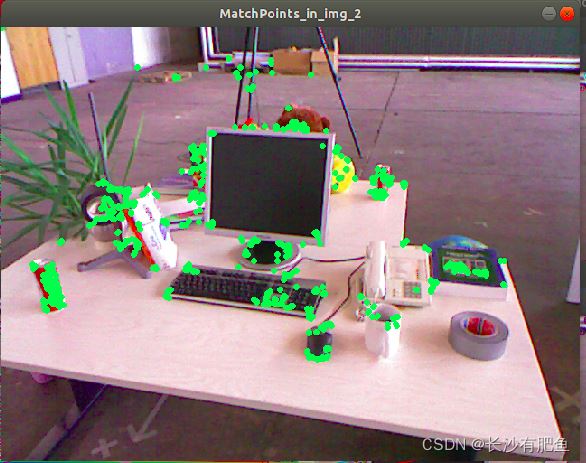
用surf算法,特征检测,
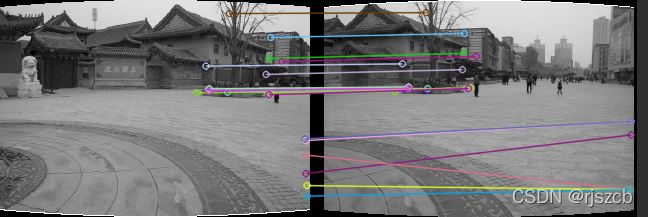
合成这样,呵呵呵,
以上就是C语言 OpenCV实现柱面投影的详细内容,更多关于C语言 OpenCV柱面投影的资料请关注编程学习网其它相关文章!
沃梦达教程
本文标题为:C语言 OpenCV实现柱面投影


基础教程推荐
猜你喜欢
- 这个宏可以转换成函数吗? 2022-01-01
- 在 C++ 中计算滚动/移动平均值 2021-01-01
- 如何在 C++ 中初始化静态常量成员? 2022-01-01
- 我有静态或动态 boost 库吗? 2021-01-01
- 常量变量在标题中不起作用 2021-01-01
- 静态库、静态链接动态库和动态链接动态库的 .lib 文件里面是什么? 2021-01-01
- 如何检查GTK+3.0中的小部件类型? 2022-11-30
- 如何将 std::pair 的排序 std::list 转换为 std::map 2022-01-01
- C++结构和函数声明。为什么它不能编译? 2022-11-07
- 如何通过C程序打开命令提示符Cmd 2022-12-09


