最近在网上看到一些抽屉效果,看起来很酷!很眩!但是,下不下来看代码, 所以决定还是自己写吧!!这篇文章通过近100行的代码就实现了简单的抽屉效果,有需要的朋友们可以参考借鉴,下面来一起看看吧。
前言
iOS中抽屉效果的简单实现现在很多应用中都使用到了,网上也有很多了例子,本文主要是通过简单的一些代码来实现的,有需要的可以一起学习学习。
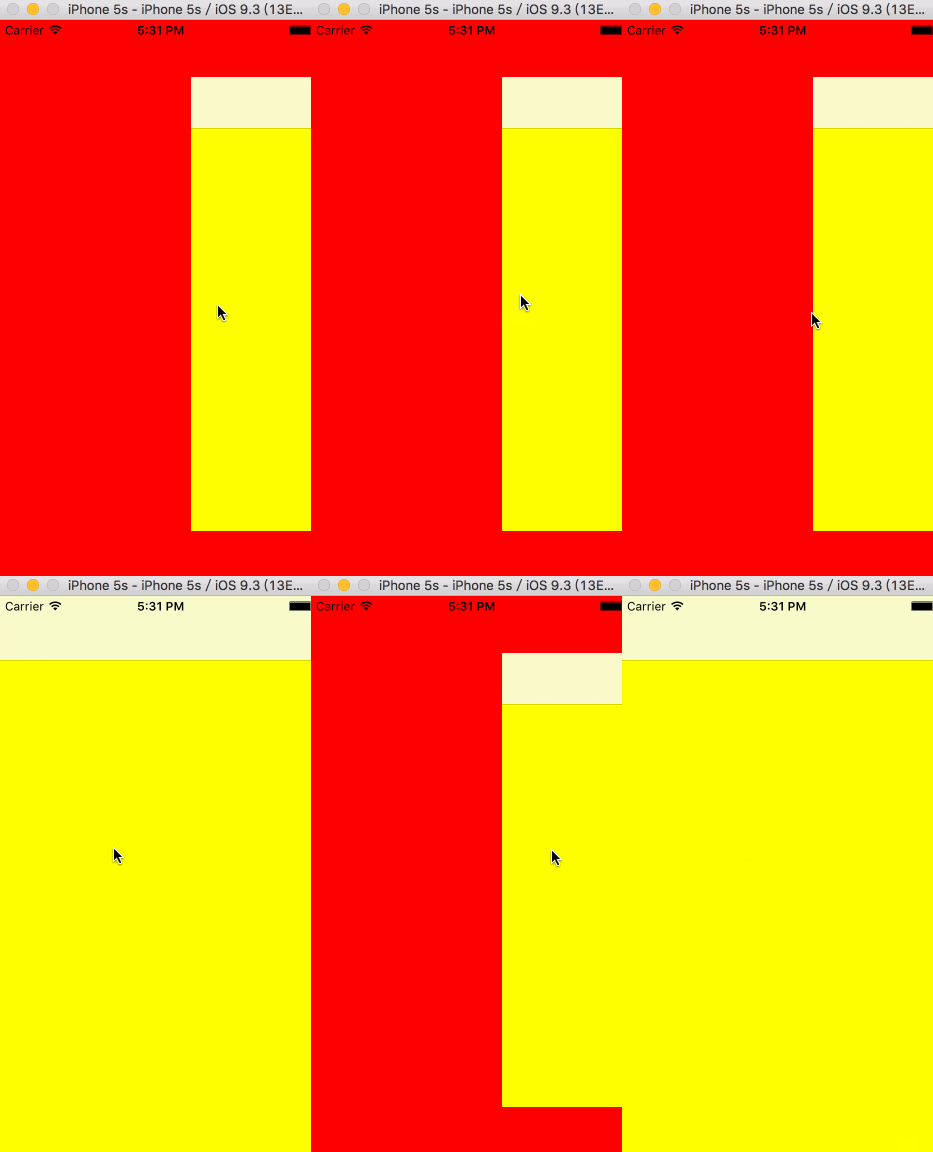
下面是效果图
示例代码如下
#import <UIKit/UIKit.h>

@interface MainViewController : UIViewController
+ (instancetype)mainViewControllerWithLeftViewController:(UIViewController *)leftViewController withMainPageViewController:(UIViewController *)mainPageViewController;
@end
#import "MainViewController.h"

#define KWidth self.view.frame.size.width
#define KHeight self.view.frame.size.height

@interface MainViewController ()
@property (nonatomic,strong)UIViewController *leftVC;
@property (nonatomic,strong)UIViewController *centerVC;
@property (nonatomic,assign)BOOL isSlider;
@property (nonatomic,strong)UIView *corverView;
@end


@implementation MainViewController
+ (instancetype)mainViewControllerWithLeftViewController:(UIViewController *)leftViewController withMainPageViewController:(UIViewController *)mainPageViewController{

  MainViewController *mainVC = [[MainViewController alloc] init];
  mainVC.leftVC = leftViewController;
  mainVC.centerVC = mainPageViewController;
  return mainVC;
}
- (void)viewDidLoad{
  [super viewDidLoad];
  self.isSlider = NO;
  self.view.backgroundColor = [UIColor whiteColor];
  [self addChildViewController:self.leftVC];
  [self.view addSubview:self.leftVC.view];
  [self addChildViewController:self.centerVC];
  [self.view addSubview:self.centerVC.view];
  // 给左视图和主视图添加手势
  [self addGestureForView];
}
// 给主视图添加遮盖
- (void)addCorverView{
  if (self.corverView) {
    [self.corverView removeFromSuperview];
    self.corverView = nil;
  }
  self.corverView = [[UIView alloc] initWithFrame:self.centerVC.view.bounds];
  _corverView.backgroundColor = [[UIColor blackColor] colorWithAlphaComponent:0.0];
  [self.centerVC.view addSubview:self.corverView];
}
// 移除主视图遮盖
- (void)removeCoverView{
  if (self.corverView) {
    [self.corverView removeFromSuperview];
    self.corverView = nil;
  }
}
// 给左视图和主视图添加手势
- (void)addGestureForView{
  UISwipeGestureRecognizer *rightGesture = [[UISwipeGestureRecognizer alloc] initWithTarget:self action:@selector(swipeRightAction:)];
  rightGesture.direction = UISwipeGestureRecognizerDirectionRight;
  [self.centerVC.view addGestureRecognizer:rightGesture];
  UISwipeGestureRecognizer *leftGesture = [[UISwipeGestureRecognizer alloc] initWithTarget:self action:@selector(swipeLeftAction:)];
  leftGesture.direction = UISwipeGestureRecognizerDirectionLeft;
  [self.centerVC.view addGestureRecognizer:leftGesture];
  UISwipeGestureRecognizer *leftVCLeftSwipeGesture = [[UISwipeGestureRecognizer alloc] initWithTarget:self action:@selector(leftVCLeftSwipeAction:)];
  leftVCLeftSwipeGesture.direction = UISwipeGestureRecognizerDirectionLeft;
  [self.leftVC.view addGestureRecognizer:leftVCLeftSwipeGesture];
}
- (void)swipeRightAction:(id)sender{
  [self moveView:self.centerVC.view scale:0.8 panValue:KWidth];
  self.isSlider = YES;
  [self addCorverView];
}
- (void)swipeLeftAction:(id)sender{
  [self moveView:self.centerVC.view scale:1 panValue:KWidth / 2];
  self.isSlider = NO;
  [self removeCoverView];
}
- (void)leftVCLeftSwipeAction:(id)sender{
  [self moveView:self.centerVC.view scale:1 panValue:KWidth / 2];
  self.isSlider = NO;
  [self removeCoverView];
}
// 平移和缩放一个视图
- (void)moveView:(UIView *)view scale:(CGFloat)scale panValue:(CGFloat)value{
  [UIView beginAnimations:nil context:nil];
  view.transform = CGAffineTransformScale(CGAffineTransformIdentity,scale,scale);
  view.center = CGPointMake(value, view.center.y);
  [UIView commitAnimations];
}
@end
总结
以上就是这篇文章的全部内容了,希望本文的内容对大家的学习或者工作能有所帮助,如果有疑问大家可以留言交流。
沃梦达教程
本文标题为:iOS如何用100行代码实现简单的抽屉效果


基础教程推荐
猜你喜欢
- Android Kotlin使用SQLite案例详解 2023-04-16
- Android Studio实现下拉列表效果 2023-05-23
- 详解ios11中estimatedRowHeight属性 2023-04-24
- Android socket如何实现文件列表动态访问 2023-04-05
- Android自定义View验证码输入框 2023-02-04
- iOS如何去掉导航栏(UINavigationBar)下方的横线 2023-03-07
- android: targetSdkVersion升级中Only fullscreen activities can request orientation问题的解决方法 2022-11-05
- iOS输入框的字数统计/最大长度限制详解 2023-06-03
- Android自定义View实现地铁显示牌效果 2023-01-01
- 如何在iOS中高效的加载图片详解 2023-07-02
